


Document Actions
gvSIG-Desktop 1.1. Manual de usuario.
Selección de elementos
Introducción
You can select one or several elements or items by making either a graphic request or an alphanumeric request.
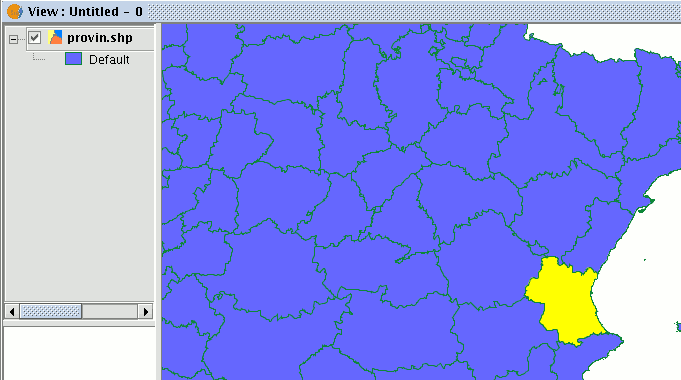
The selected data are shown in the view in the colour you have configured (by default this is yellow).
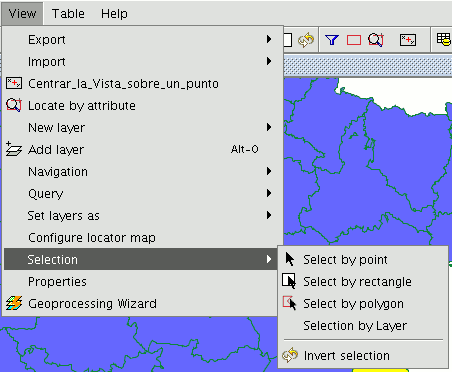
You can access the different ways of selecting elements by going to the tool bar or by going to the “View” menu and then to “Selection” as long as the layer you wish to work with has already been activated in the ToC.
Selección por punto

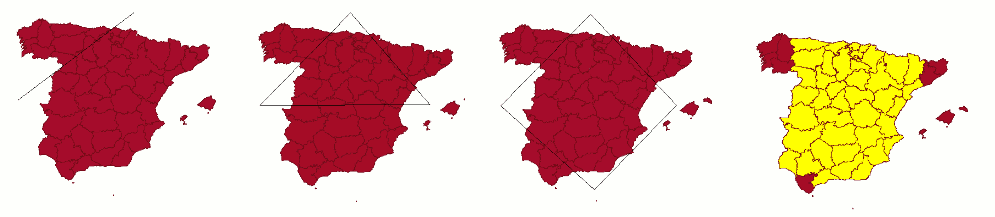
This is the basic selection method and consists of clicking on the element you wish to select.
Selección por rectángulo

This allows you to select the elements which are partly or wholly located inside a rectangle.
To define the rectangle, place the cursor point over the position you wish to start to draw the rectangle in, left click on the mouse and hold the button down until you have defined the area you wish to select.
Selección por polígono

This allows you to select elements which are partly or wholly located inside a polygon.
To define this polygon, place the cursor in the part of the view you wish to draw the selection polygon in. Left click on the mouse in the view to add the polygon vertices.
When you have finished, double click on the mouse. All the elements which are located inside the polygon or which intersect with any of its sides will be selected.
Selección por capa
You can access this tool by going to the “View” menu then to “Selection” and “Selection by layer”. It allows you to select elements in the active layer based on the selection made in another layer.

The options available using this tool are:
- 1.New set: This creates a new selection set.
- 2.Add to set: This creates a selection set based on the previous request and the current request.
- 3.Select from set: This creates a selection set from what has already been selected, the current selection request is extracted from the previous one.
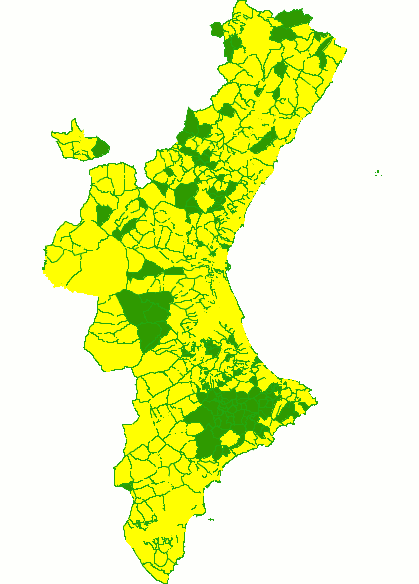
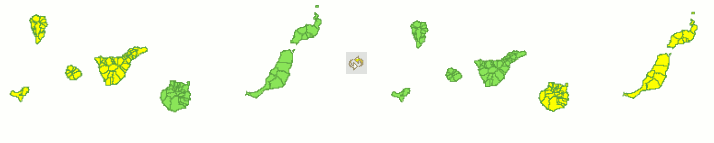
An example of how to use this tool consists of selecting the cities and towns of the Valencian Region whose municipal boundaries are affected by flood risks.
We start with a shape file with the areas of the provinces in the Valencian Region which are subject to flood risks.
Then the layer corresponding to all the cities and towns in the Valencian Region is added. Pre-select the full flood risk layer.
We go to the “Selection by layer” tool. Use the “Intersect with” option in the first pull-down menu, “Select items from active layers that are:…”.
Use the “riesgo_inundación_25000_completo” option in the second pull-down menu “Selected items of a layer”.

We can now click on “New set” and the layer with the new selection will appear.
Selección por atributos
You can access this tool using the following button:

gvSIG allows selections to be made using requests (filters). Selecting elements by attributes allows you to define exactly what you want to select, including several attributes, operators and calculations.
Requests can be made using logical operators, such as “equals” “more than” “different from”, etc.
If you press the “Filter” button in the tool bar, a dialogue window will appear to define your request.
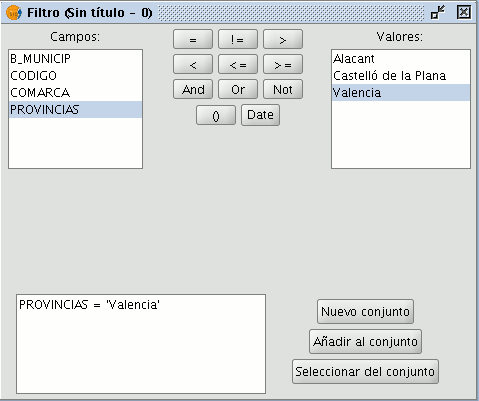
1.Fields: Double click on the field you wish to add to your request from the “Fields” list in the layer.
2.Logical operators: These allow you to insert a logical expression into your request by clicking on them.
3.Values: This shows a list with the different values the selected field has. If you wish to add a value to the request, double click on it.
4.Request: This is the window which represents the request to be made. You can write here directly.
5.Selection buttons: These buttons make the request using:
New set (deletes any previous selections).
Add to set (adds the elements selected by the request to the existing elements).
Select from set (makes the request from the selected elements).
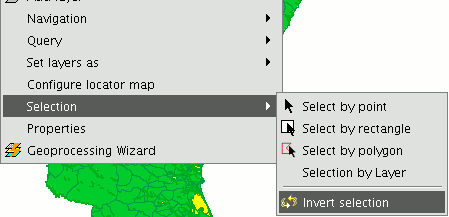
Invertir selección
When you have made your selection, you can click on the following button in the tool bar

or you can go to the “View” menu then to “Select” and “Invert selection”
and invert the previous selection as shown below.
Borrar selección

If you click on this button, the selected element set will once again become empty. You can also access this option by going to the “Layer” menu then to “Clear selection”.


